When was the last time you gave your ankles some love? Do you even know how to strengthen ankles?
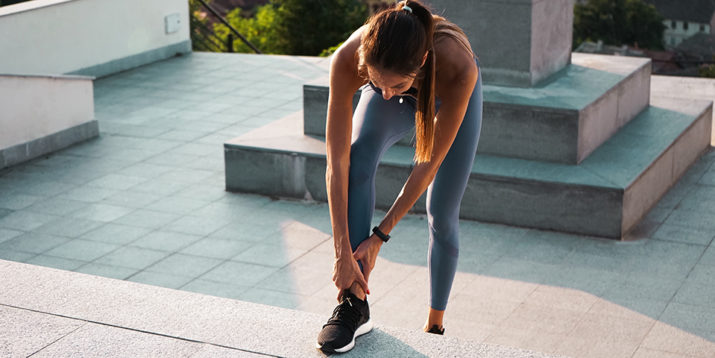
If you’re like most people, the answers are “never” and “no”: Ankles are among the least frequently trained — yet most often injured — parts of the body.
About 25% of all sports-related injuries involve them, and 30,000 people — athletes and non-athletes alike — sprain them in the U.S. every day.
A million of those people wind up in the hospital annually.
Ankles, like the lower back and knees, are particularly vulnerable to injury.
This may be because our feet are almost always encased in shoes, which limits their mobility and sensitivity.
Deprived of sensory information from the toes and feet, your ankles can wind up taking a lot of unnecessary punishment.
And if your shoes prevent your feet from moving naturally, or prevent movement in your ankles and feet (think high heels, boots, or high-tops that immobilize your ankles), then it’s no wonder that your ankles take a beating any time you do anything active.
The ankle joint also plays a vital role in exercises like squats, lunges, and hip-hinge variations.
“What do these staple movements have in common?” asks physical therapist Dr. John Rusin. “The need for clean and crisp ankle mobility and stability.”
Even though these moves focus primarily on the knee and hip joints, he explains, limitations in the ankle can throw your mechanics off when you perform them, so they’re less effective at best—and injurious at worst.
If you’ve ever sprained, strained, or broken your ankle — and most active people have — you know how painful it is.
That’s not only because your ankle hurts, but because that one misstep will likely cost you a month or more away from running, lifting, cycling, and most other fitness activities you enjoy.
And yet: the most the typical exerciser does to prevent ankle injuries is a few half-hearted calf stretches a couple of times a week.
Assuming that one of the main reasons we work out is to stay on our feet, walking around with a spring in our step as long as possible, we need to give some TLC to our ankles.
Here’s how — if possible, perform these moves in bare feet: you’ll give your toes room to breathe and gain a greater range of motion in the joints in your lower legs.
1. Standing Inversion
Stand upright with your feet shoulder-width and roughly parallel.
Keeping the rest of your body comfortably relaxed and aligned (arms hanging loosely by your sides, knees straight but soft, hands relaxed, shoulders down, head and spine upright), roll your feet outward, lifting the big-toe sides of your feet from the floor and balancing on the outsides of both feet.
Hold for a two-count.
Reverse the move, returning to the starting position.
Do 10-12 reps.
2. Standing Eversion
Stand upright with your feet shoulder-width and roughly parallel.
Keeping the rest of your body comfortably relaxed and aligned (arms hanging loosely by your sides, knees straight but soft, hands relaxed, shoulders down, head and spine upright), roll your feet inward, lifting the pinkie-toe side of your foot from the floor and balancing on the insides of both feet. Take care NOT to collapse your knees inward! The movement should occur at your ankle and lower leg.
Hold for a two-count.
Reverse the move, returning to the starting position.
Do 10-12 reps.
3. Standing Ankle Circles
Stand upright with your feet shoulder-width and roughly parallel.
Keeping the rest of your body comfortably relaxed and aligned (arms hanging loosely by your sides, knees straight but soft, hands relaxed, shoulders down, head and spine upright), raise your right heel from the floor.
Maintaining pressure through the ball of your foot, rotate your ankle 10 times clockwise, then 10 times counter-clockwise.
Lower your right heel back to the floor and repeat with your left foot.
4. Lying Ankle Circles
Lie on your back, keeping your right leg straight (toes pointed upward) as you interlace your fingers under your left thigh with your left knee bent and left foot raised off of the floor.
From this starting position, slowly circle your left ankle clockwise for 20 reps.
Switch sides and perform 20 reps with your right ankle.
Switch sides again and circle your left ankle 20 times counter-clockwise.
Finally, switch again and circle your right ankle 20 times counter-clockwise.
5. Heels-Up Toe Raises
Stand tall with your feet shoulder-width apart and roughly parallel, heels on a stair or exercise step, holding a railing or other sturdy, stationary object for balance.
Keeping the rest of your body comfortably relaxed and aligned (arms hanging loosely by your sides, knees straight but soft, hands relaxed, shoulders down, head and spine upright), raise the balls of your feet as high as possible, contracting the muscles on the fronts of your shins. Hold for a two-count.
Lower the balls of your feet as far as you can without slipping off the stair, and hold for a two count.
Do 20 reps.
6. Standing Calf Raises
Stand upright with your feet shoulder-width apart and roughly parallel, balls of your feet on a stair or exercise step, holding a railing or other sturdy, stationary object for balance.
Keeping the rest of your body comfortably relaxed and aligned (arms hanging loosely by your sides, knees straight but soft, hands relaxed, shoulders down, head and spine upright), raise your heels as high as possible while contracting your calves as hard as possible. Hold for a two-count.
Slowly lower your heels as far as possible, stretching your calves fully, and hold for a two-count.
When was the last time you gave your ankles some love? Do you even know how to strengthen ankles?
If you’re like most people, the answers are “never” and “no”: Ankles are among the least frequently trained — yet most often injured — parts of the body.
About 25% of all sports-related injuries involve them, and 30,000 people — athletes and non-athletes alike — sprain them in the U.S. every day.
A million of those people wind up in the hospital annually.
Ankles, like the lower back and knees, are particularly vulnerable to injury.
This may be because our feet are almost always encased in shoes, which limits their mobility and sensitivity.
Deprived of sensory information from the toes and feet, your ankles can wind up taking a lot of unnecessary punishment.
And if your shoes prevent your feet from moving naturally, or prevent movement in your ankles and feet (think high heels, boots, or high-tops that immobilize your ankles), then it’s no wonder that your ankles take a beating any time you do anything active.
The ankle joint also plays a vital role in exercises like squats, lunges, and hip-hinge variations.
“What do these staple movements have in common?” asks physical therapist Dr. John Rusin. “The need for clean and crisp ankle mobility and stability.”
Even though these moves focus primarily on the knee and hip joints, he explains, limitations in the ankle can throw your mechanics off when you perform them, so they’re less effective at best—and injurious at worst.
If you’ve ever sprained, strained, or broken your ankle — and most active people have — you know how painful it is.
That’s not only because your ankle hurts, but because that one misstep will likely cost you a month or more away from running, lifting, cycling, and most other fitness activities you enjoy.
And yet: the most the typical exerciser does to prevent ankle injuries is a few half-hearted calf stretches a couple of times a week.
Assuming that one of the main reasons we work out is to stay on our feet, walking around with a spring in our step as long as possible, we need to give some TLC to our ankles.
Here’s how — if possible, perform these moves in bare feet: you’ll give your toes room to breathe and gain a greater range of motion in the joints in your lower legs.
1. Standing Inversion
2. Standing Eversion
3. Standing Ankle Circles
4. Lying Ankle Circles
5. Heels-Up Toe Raises
6. Standing Calf Raises
Looking for more expert fitness tips? Head over to BODi and find out how BODi’s at-home workouts, nutrition programs, and online community work together to help you reach your health and fitness goals.